Purchase Order Window
The Purchase Order window streamlines the complexities of purchasing management by allowing the purchasing process to be accomplished through this window. For more information, click the link to learn how to enter a Purchase Order.
Get started by opening the Purchase Order window:
- From the Acctivate desktop: Select Purchasing >Purchase Order from the drop-down menu
- From the toolbar: Click the Purchase Order button.

Once you’ve opened the Purchase Order window, click “New” to start a new PO. Note that some information (Status, Terms, Warehouse address, etc.) will be filled in automatically as soon as “New” is clicked. These are the “Purchasing Defaults”, and can be configured by going to File > Configuration Management > Purchasing > Purchasing Options. Below is an example of a new Purchase Order.
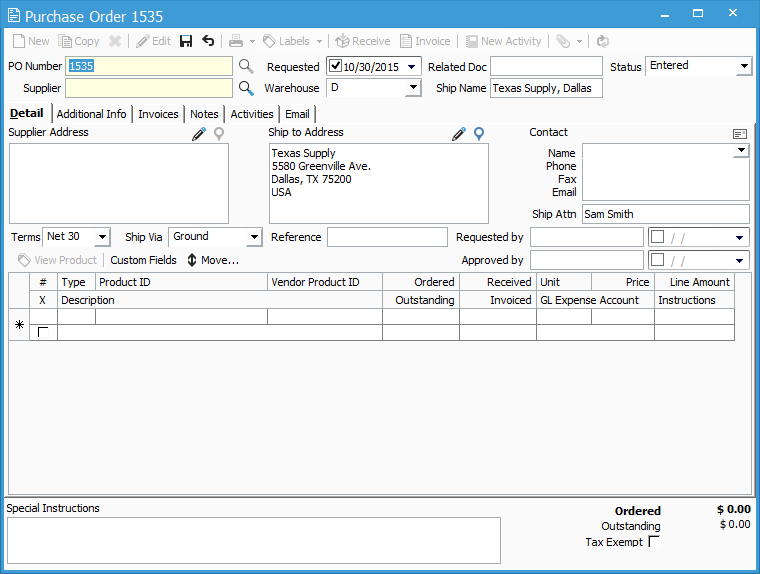
The upper portion of the Purchase Order Window stores the PO Number, the Vendor ID (Supplier), Status of the PO, Terms, Requested and Approved by information.
At the very bottom of the window you will notice the Special Instructions field, in which you can enter free text related to the Purchase Order. Also you will see the ordered dollar amount and the amount outstanding (product waiting to be invoiced) on the order.
The Detail tab will contain all of the Vendor information, Ship To information, Contact information, and the data from when the order was entered, who entered it, when, last updated, etc.
The Detail tab will also contain all of the Product information on the PO, including the quantity ordered, received and invoiced, as well as the price. The “Type” field will show whether it is a standard item, labor, shipping, special order or drop ship. To the right you will notice the quantity fields:
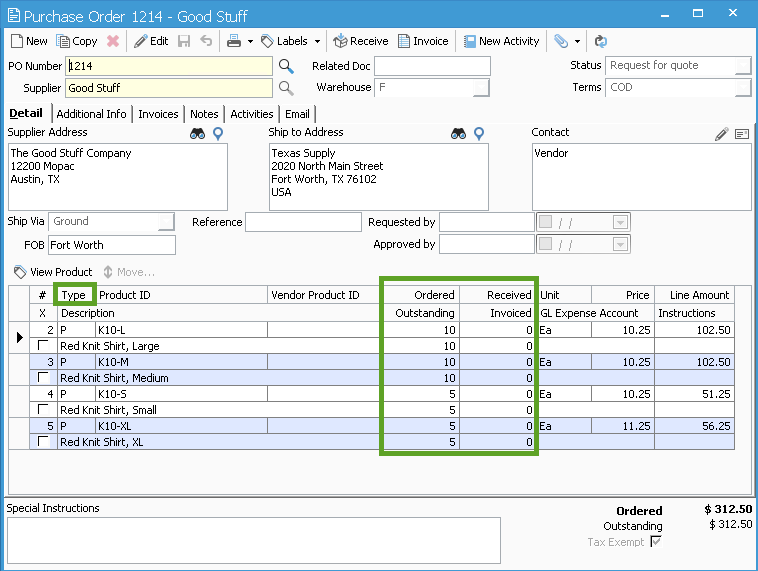
The top line shows the quantity ordered and/or received, below are the Outstanding and/or Invoiced quantities. In this example all items have been received so there are no outstanding items, but they have not been invoiced yet. Click here to learn how to create Purchase Invoices. If you would like to view specific product information, simply click “View Product” above the Data grid.
The Additional Info tab contains specific date information related to the PO (Requested, Promised, Not Before and Not After dates are found here).
You can keep Notes on the PO by pressing the Edit button and entering the notes on the Notes tab.
Any related business activities will be on the Activities tab, and all Emails sent from the Purchase order will be stored on the Email tab.