- Knowledge Base
- Learn
- Customer
-
Getting Help
-
Installation
-
Learn
- Business Activities
- Business Activity Manager
- Business Alerts
- Configuration
- Customer
- Database
- EDI
- General
- Inventory
- Manager Windows
- Mobile
- Picklists (Advanced Picking)
- Product
- Purchasing
- Purchase Order Manager
- QuickBooks & Acctivate Basics
- QuickBooks Desktop Sync
- QuickBooks Online Sync
- Reporting
- Sales
- Sales Order Manager
- Sales Tax
- Server
- Shipping
- Startup
- User Interface
- Webstore
-
Troubleshoot
-
Specs
-
How do I?
Exporting the Customer List.
Before you can see the "Export Customer List" option in your file menu, you'll need to go through the initial one-time setup.
One-Time Setup
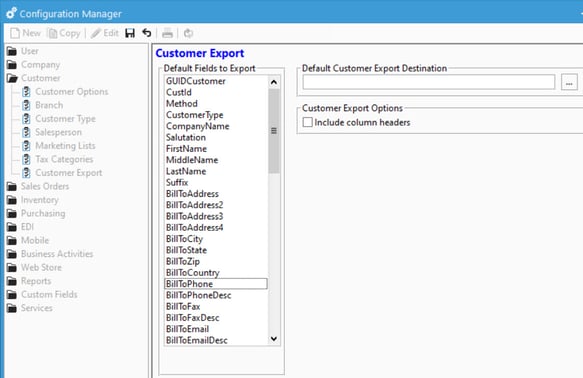
First, you’ll need to define which columns to include in the export file. The export uses the Customer data view, so you’ll have access to most of the customer account information as well as their balance. You will only need to set up the fields to include one time in Configuration Management.
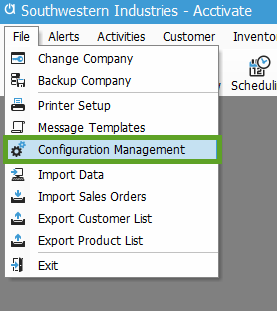
- Open Configuration Management from the main File menu.
- Choose Customer Export under the Customer folder.
- Click Edit on the toolbar then select the fields to be included in the export file.
- Optionally, choose a default file/location for the export file.
- When choosing the default location, you will also need to enter a default name for the file as well.
- Optionally, choose a default file/location for the export file.
-
- Optionally, choose to "Include column headers" to export the field name as well.
Export Customer List
-
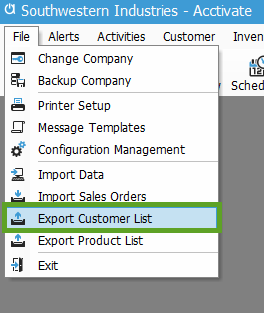
Once the Customer Export list is configured (see above), a new Export Customer List menu will appear under the main File menu.
-
Select the file/folder location to save the export file by clicking the
 button.
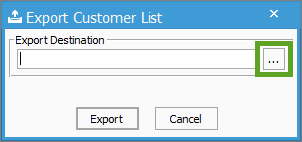
-
Select a folder/library from the list on the left and choose a file name. You can select an existing file and it will overwrite that file.
-
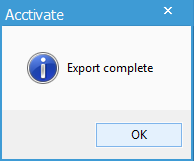
Click Export and you will receive the following confirmation message.
After receiving the confirmation, you're done! You can now open your customer list in Excel, or any program that supports CSV files.