- Knowledge Base
- Troubleshoot
- Reports
-
Getting Help
-
Installation
-
Learn
- Business Activities
- Business Activity Manager
- Business Alerts
- Configuration
- Customer
- Database
- EDI
- General
- Inventory
- Manager Windows
- Mobile
- Picklists (Advanced Picking)
- Product
- Purchasing
- Purchase Order Manager
- QuickBooks & Acctivate Basics
- QuickBooks Desktop Sync
- QuickBooks Online Sync
- Reporting
- Sales
- Sales Order Manager
- Sales Tax
- Server
- Shipping
- Startup
- User Interface
- Webstore
-
Troubleshoot
-
Specs
-
How do I?
Resolving Page Size Issues on Reports
Page size is pulled from Crystal Report files
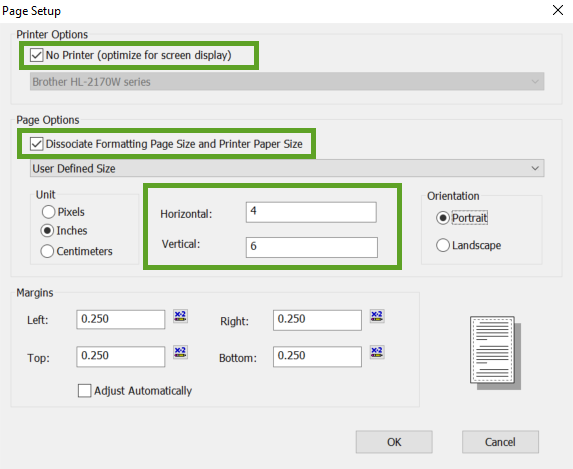
To edit your custom reports to have a page size that will pull correctly in the current version of Crystal Reports Viewer in Acctivate, you will need to edit the reports in Crystal Reports. Go to File > Page Setup. Then check “No Printer (optimize for screen display)” as well as “Dissociate Formatting Page Size and Printer Paper Size”. These options will allow you to explicitly state the size of the report and will allow Acctivate to pull the report in that size no matter what printer is selected.
Workstation Stock Setup
Then, on the workstation where the report will be printed, you will need to make sure that the printer settings are configured correctly.
- Open Devices and Printers on workstation.
- Select correct Printer used for this report.
- Right Click on the printer and select Printer Properties.
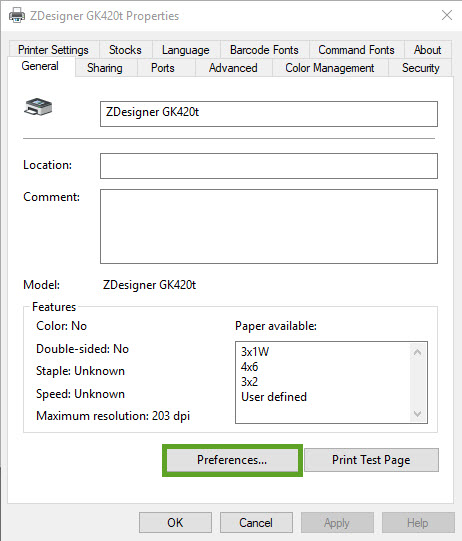
- On the General Tab, select Preferences.
- Then select the stock that matches the label size you are trying to print.
- Select Apply and then OK.
- On the Properties window, go to the Advanced tab and select Printing Defaults.
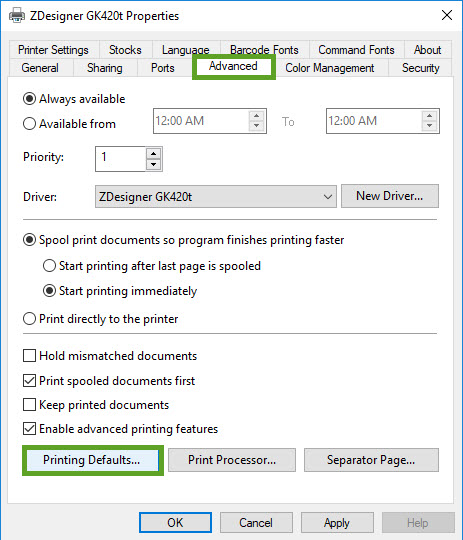
- Again, select the proper stock size for the report you are printing.
- Select Apply and OK.
- Then Apply and OK again on the Properties window.
- If the Stock size you are looking for doesn’t exist, you may need to add it. If this printer is shared on the Network, make sure that each workstation it is connected to has these settings.
Contact Acctivate Support if you have any issues or questions about this setup.