Create an "AvaTax" Tax item in QuickBooks, set that item in Configuration Manager, then set it as the customer's Tax Category. Exemption codes can be managed with customer types.
Once you have completed the initial setup of the Avalara integration with Acctivate, you will need to configure your customers in which Sales Orders should be taxed via AvaTax.
Table Of Contents
- Set up AvaTax Tax Code for QuickBooks Desktop
- Set up AvaTax Tax Code for QuickBooks Online
- Configure Acctivate
Create and implement ‘AvaTax’ Tax Code in QuickBooks Desktop
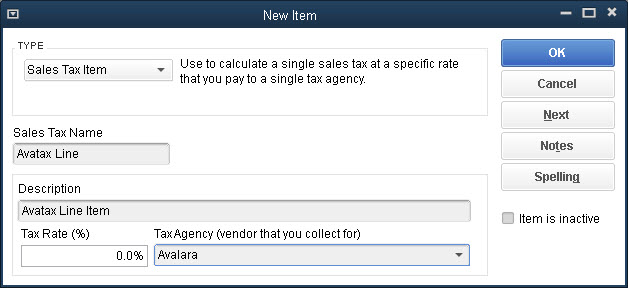
- In QuickBooks, go to Lists > Item List > Item > New Item and create a new Sales Tax Item called Avatax. The tax rate should be 0.0% with the vendor set to Avalara since the service will be handling tax calculations and payments. The new item should look similar to the following example:

- Another Sales Tax Item should be set up the same as above. However, it should have the Sales Tax Name of Avatax Line. For example:
- Complete the synchronization with QuickBooks, which will push the new sales tax items to Acctivate.
Create and implement ‘AvaTax’ Tax Code in QuickBooks Online
-
In QuickBooks Online, navigate to the Sales Tax Settings page.
-
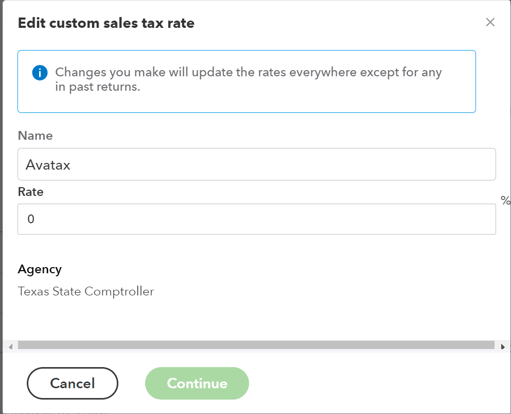
Click Add Rate to create a new Custom Sales Tax Rate. It should be a Single rate name AvaTax, set the Agency to any tax agency (you can use your local agency), and enter a Rate of 0%
-
Create a GL account with an Account Type of Other Current Liabilities and a Detail Type of Sales Tax Payable. Enter a Name for the account, e.g., "Sales Tax Payable".
-
Next, create a Service item named Avatax Line. Enter a Price of $0 and select the account you created in the previous step as the Income account.

Configure Acctivate to use line item
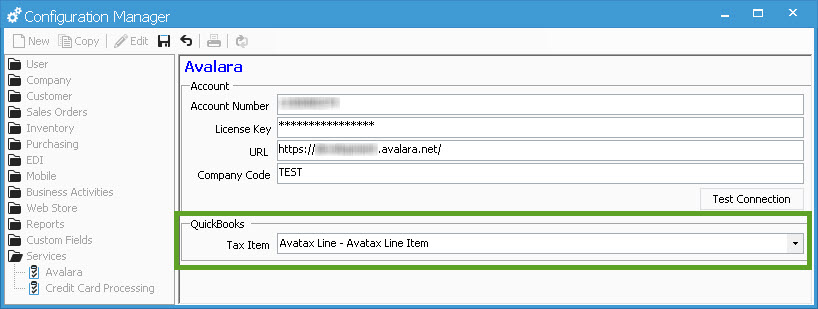
- In Acctivate, assign the newly created sales tax items to be used when Sales Orders should be calculated via Avalara. To accomplish this, browse to File > Configuration Manager. Drill down to Services > Avalara. Here, you can set the Tax Item to the ‘Avatax Line’ Tax Item.
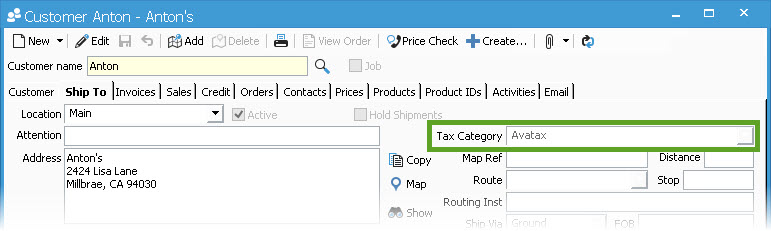
- In Acctivate, set the Tax Category on your Customer – Ship Tos to the ‘Avatax’ tax category.
Use Customer Types to map Avalara Usage Codes
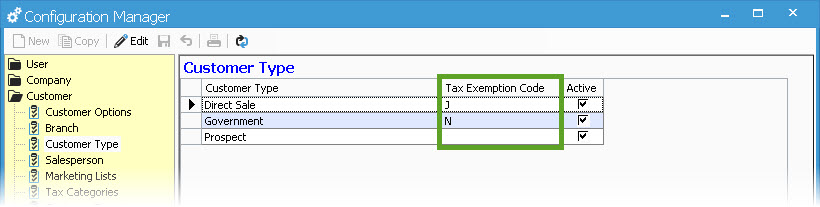
- Avalara utilizes Customer Usage codes (A.K.A Entity Use codes) for sales tax exemption based on the customer type. You can enter these customer exemption codes in the Customer Type setup in Configuration Manager. To accomplish this, browse to File > Configuration Manager. Drill down to Customer, then Customer Type.
- Here, you can enter the Tax Exemption Code based on the Customer Type. You may need to create a Customer Type based on the Customer Usage code you will be required to use. Screenshot in step 3 shows where to assign the related Customer Type. For a list of Tax Exemption Codes to assign to your customer types, please refer to this article from AvaTax.
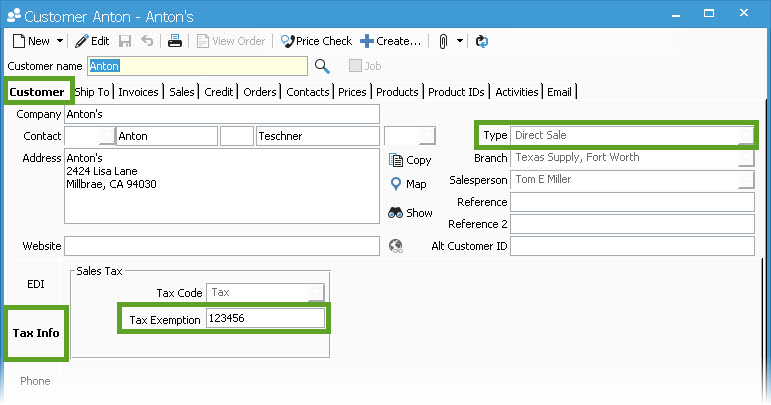
3. In order for the Customer Exemption Code to be utilized you will also need to set the Customer’s Tax Exemption Code on the Customer record. You can find this field on the Customer window by opening the related customer and selecting the ‘Tax Info’ sub-tab of the Customer Tab.
Once these steps have been completed, any newly created Sales Orders for any customer in which you have set the customer ship to Tax Category to ‘AvaTax’ should be reviewed and sales tax to be calculated by Avalara.
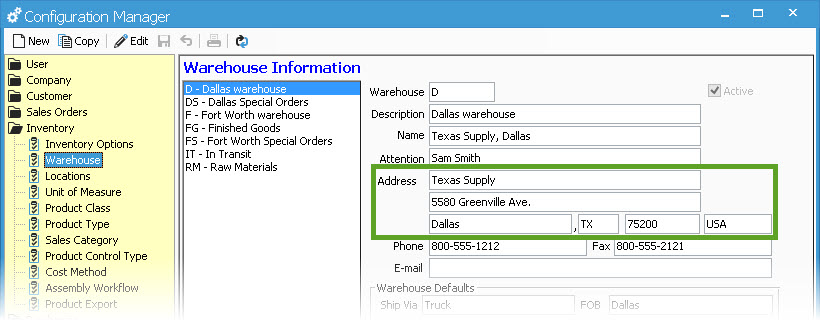
Warehouse Address Information
Avalara requires each warehouse in Acctivate to have a complete address. If you receive an error when saving an order related to an invalid or incomplete address, review the Warehouse settings in Configuration Manager and make sure that the address fields contain complete and valid information. According to Avalara, a taxable address must include a (line, city, and region (state)) or a (line and zip) or a (region (state) and postal code).
Once set up and tested in Acctivate, make sure to disable Avalara in QuickBooks. If it’s set up in both programs, the service will be called in Acctivate and again in QuickBooks.
For more information about errors returned by Avalara, see our Common Avalara Errors article.