Here is an example in which Lots of an Assembly product are combined.
Combine Lots of an Assembly into one Lot
For customers that use Lot-controlled Assemblies, Acctivate will allow you to combine multiple Lots of the assembly into one Lot. There is a very specific process in which this scenario can be accomplished, however.
In order to combine Assembly Lots, you need to add the Assembly as a component of itself. In order for Acctivate to allow you to include the Assembly as a component of itself, the Assembly MUST be Lot-controlled and the Cost Method MUST be set to ‘Actual’ cost. If your Assemblies were using a different Cost Method, posting an Assembly and adding the Assembly as a component of itself would create a cyclical cost calculation issue. Being that the ‘Actual’ Cost Method is a way of tracking Cost of Goods Sold at the Lot level, the Cost calculation of the Assembly will be based on the cost of the component lots, which mitigates the cyclical cost calculation issue.
Here is an example in which Lots of an Assembly product are combined:
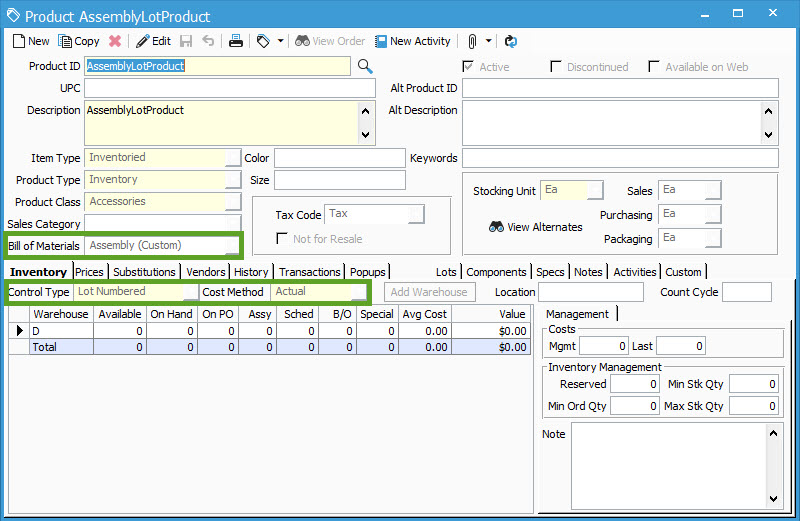
- For this example, In my Demo company, I created a new Inventoried Product that is Lot controlled and the Cost Method is set to ‘Actual’.
- Being that this is an Assembly, I set the Bill of Materials to ‘Assembly (Custom)‘. I could also have used ‘Assembly (Process)’.
- I also added two components to the Assembly. Based on the type of Assembly, you may want to add the Assembly item as a Component, here, on the Components tab. In my example, I will add the Assembly as a component when I create the Assembly Transaction.
- Being that this is an Assembly, I set the Bill of Materials to ‘Assembly (Custom)‘. I could also have used ‘Assembly (Process)’.
- Once you have created your Assembly/Lot product, you will then need to build one Lot.
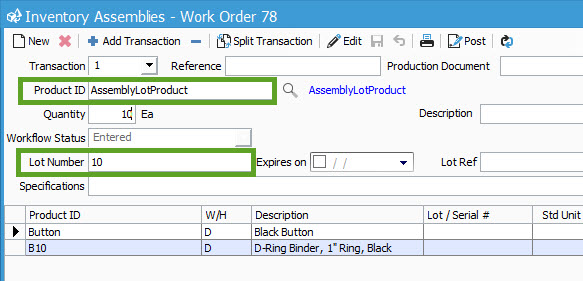
- Open the Inventory Assemblies window from the Inventory dropdown in Acctivate.
- Create and post multiple Inventory Assemblies in order to add multiple Lots to inventory.
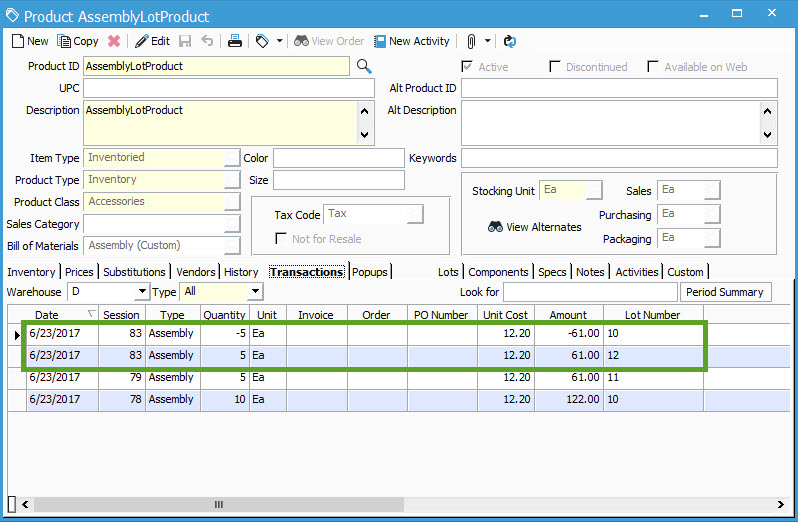
- Once you have added multiple Lot Numbers of the Assembly to your Inventory, we can then select to combine one of the Lots into another.
- Create a new Inventory Assembly for your Assembly product
- You can either enter in a new Lot number or an existing Lot Number for the Assembly Lot. I am selecting a previously create Lot Number.
- Add the Assembly product to the list of Components on the Assembly transaction. Here, you will select the Lot Number you would like to combine into the new Lot. Below, you can see that I am combining Lot number 10 into Lot number 12.
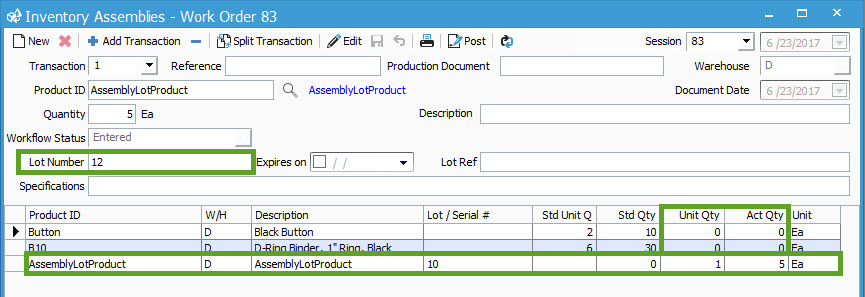
- In the example, above, notice I did not include the other components when I created an Assembly to combine Lots. I zeroed out the Unit Quantity for each component, which can only be done if the component is marked as being Variable on the Components tab of the Assembly Product.
- Post your Assembly. You should now have reduced Lot number 10 and increased Lot number 12.