Steps on how to optimize your count sheets in Acctivate
Acctivate can provide optimal inventory count organization through the use of zones and the Multiple Location Control module to further simplify the inventory count process.
Multiple Location Control tracks inventory quantities in any location that is a step below the warehouse, such as aisles, racks, bin locations, on trucks or other company-defined areas. The feature also provides organized inventory count sheets that display the locations and zones in which the product is stocked.
The greatest organization is achieved by grouping locations into zones, which will separate count sheets by zone to allow for counting each independently. For instance, each zone can be assigned to a warehouse employee and each individual can enter their count and post it at anytime, independent of each other.
Zones can be used in any way that is beneficial to a business and its operations. For example, zones can be created based on temperature requirements, rate of turnover, locations (e.g. rack, bin, bulk storage and pallet as is used in the screen shots below) or any other use as defined by a business.
Organizing inventory count sheets by zones involves the following steps:
Setting up zones
-
- Enable Multiple Location Control. This module is not included in all Acctivate packages. Reach out to sales if interested in adding this module to your Acctivate system.
- Setup warehouse locations if that has not already been done (refer to the “Creating warehouse locations to track” section in this guide here).
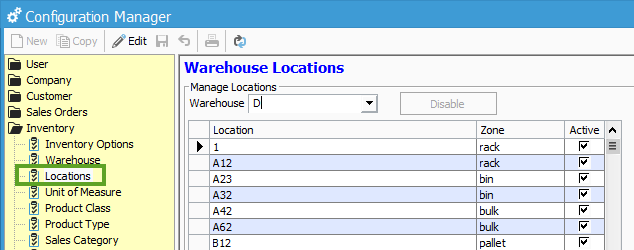
- After locations have been configured, go to the Configuration Manager in your Acctivate system (if you’re not already there) and select Inventory > Locations.
- In Warehouse Locations > Manage Locations screen, enter a zone name for all desired locations in the Zone column. Make sure the Warehouse drop-down near the top is set to the appropriate warehouse and that you set zones for all warehouses if necessary. Also, make all locations active that need to be, using the active checkbox.
- Save the changes.
Performing inventory counts with locations organized into zones
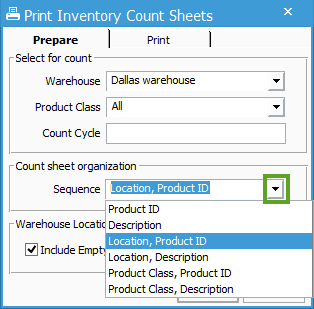
- Perform the inventory count ( refer to this guide on performing inventory counts, if necessary).Make sure that while in the Print Inventory Count Sheets window > Preparetab, you select Location, Product ID from the Sequence drop-down list.
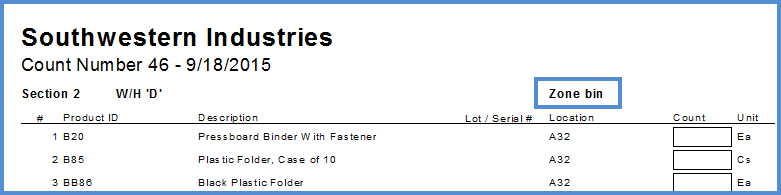
- When printing count sheets from the Print Inventory Count Sheets window > Print tab, the count sheet will be separated into different zones that can be independently distributed and counted.
- After the inventory has been counted, the count can be entered for each zone separately by different Acctivate users. Select Inventory > Enter Count to open the Inventory Count Entry window.
- Each zone is designated a section number in the Section drop-down. The zone name will display to the right of the Section field. Select the appropriate Section and begin entering the count for the products in that zone.
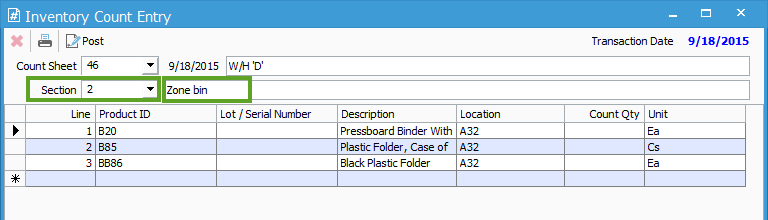
- Each zone (section) can be entered separately. Click the Post to Inventory button when you are certain that the count has been entered correctly.
Counting inventory by zones can help organize your physical inventory counts and save time when performing inventory counts.
Additionally, Acctivate provides a printable count sheet of your entire inventory within minutes and also has an optional mobile application to perform counts on a mobile device to allow for further time savings and efficiency.