Tax Categories in Acctivate represent the Sales Tax Items & Sales Tax Groups in QuickBooks. The sum of all sales tax items related to a group will determine the tax percentage for that group, which is then synced into Acctivate as a Tax Category.
Tax Categories in Acctivate represent the Sales Tax Items and Sales Tax Groups set up in QuickBooks. The sum of all sales tax items related to a group will determine the tax percentage for that group, which is then synced into Acctivate as a Tax Category. These Tax Categories are then related to different Ship To Locations for customers, so that the sales tax is based on where an order will ship to. From time to time, tax rates may change and require modifications to the sales tax items. This article will cover the process of setting up and modifying these Tax Categories and then how to relate them to your customers, in the US version of Acctivate. If using an integration with Avalara, see our Avalara Account Setup article.
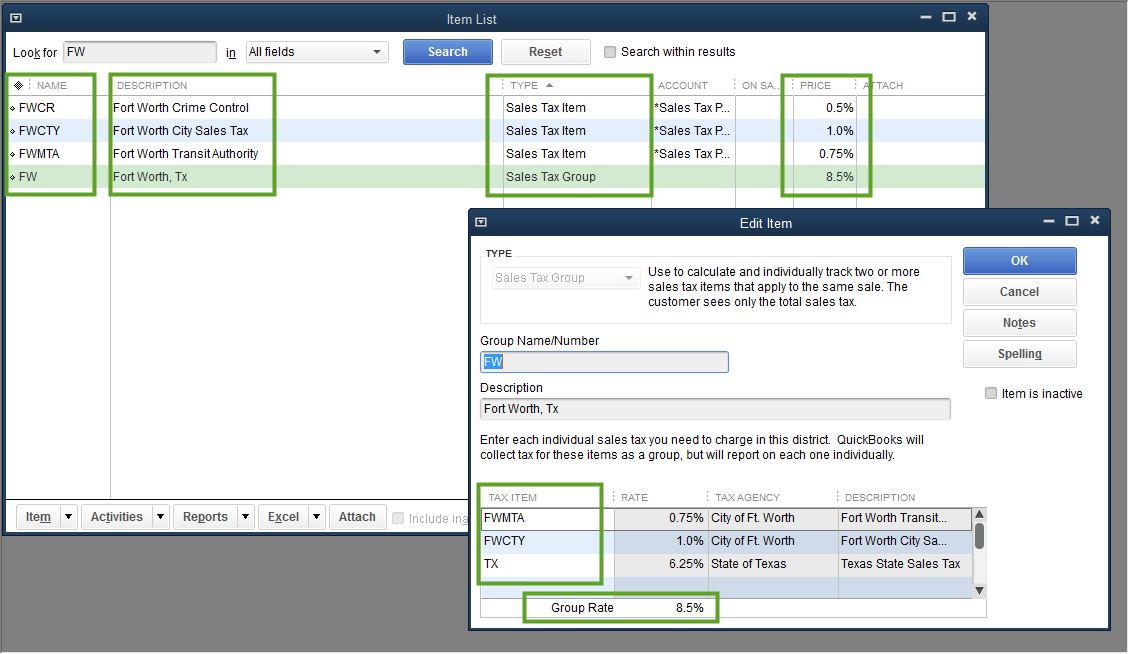
Tax Categories are created and managed in the Items List in QB with a Sales Tax Item type. In the screenshot below, we can see the sales tax configuration for Fort Worth, TX. Crime Control, City Sales Tax, Transit Authority and Texas State Sales Tax are all different Sales Tax Items, each with a different tax percentage. The sum of each of these items make up the tax rate on the parent Sales Tax Group (FW). This Sales Tax Group is what will be used as the Tax Category in Acctivate (this is just a method for configuring Sales Tax in QB, all sales tax items will sync to Acctivate, not just the groups, ask your accountant which method for configuring tax is best for your company). If the rates ever change, it's here that you will modify the rate of the Sales Tax Items. DO NOT mark any Sales Tax Items or Groups to be inactive once they've synced into Acctivate.
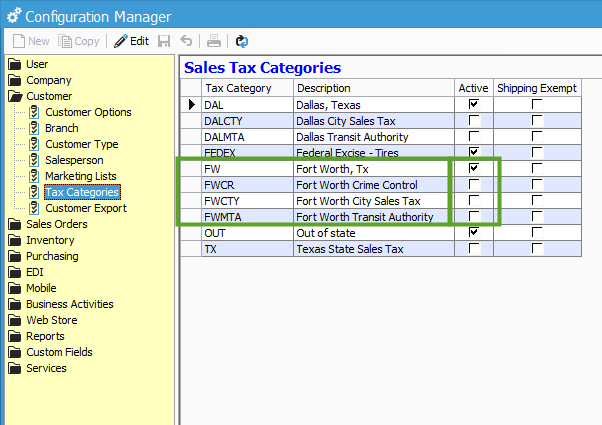
Once you've created all of the Sales Tax Items in QB and synced with Acctivate, the Sales Tax Categories can be seen in Configuration Manager. In the screenshot below, notice that the Sales Tax Items as well as the parent Group have all synced into Acctivate as Tax Categories, but only the parent Group is active. This is the Tax Category that will be used to relate to customer Ship To locations.
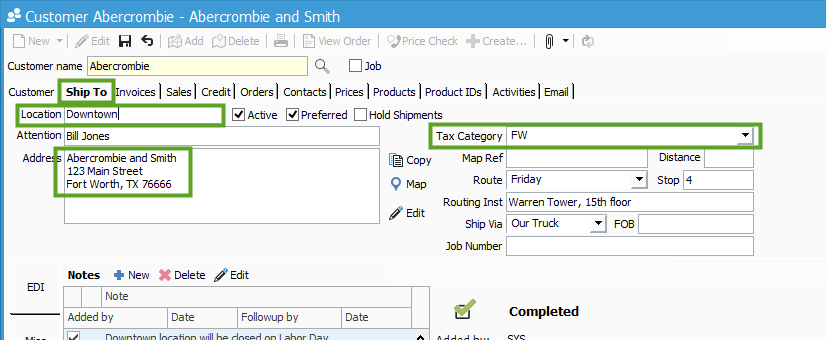
The Tax Category is then related to the Ship To Location of a customer (see our Customer Ship To help article). In the screenshot below, notice that the Customer window is open on the Ship To tab, the Downtown ship to Location is selected, which has a Fort Worth address, so the Tax Category is set to FW.
When this customer is added to a Sales Order, and the Downtown location is selected, the FW tax category will be used so the tax percentages set in QB are used to calculate sales tax on the order. In the screenshot below, notice that the Tax Category is shown with the rate at the bottom of the order.
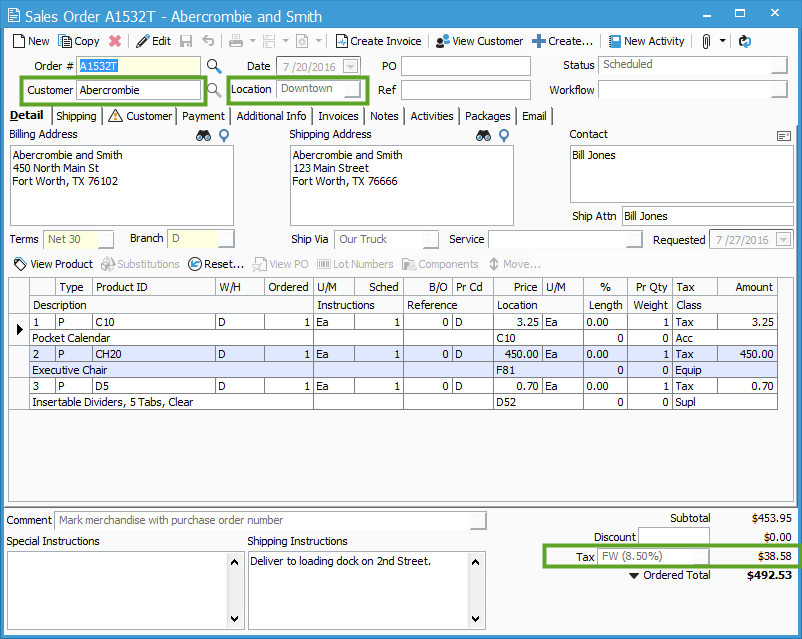
Read how Acctivate selects the tax category on the sales order here.