When setting up a webstore template, these xpaths are generally predefined but there might be cases where you need to access information that’s not currently mapped or deviates from the standard XPath setup for that webstore.
When importing in sales orders or customers from a webstore, Acctivate uses a query language called “XPath” to map information from a given XML file.
In general, once a xpath is added on the SOURCE VALUES window then you will be able to place it in it’s respective window (Sales order or customer window) in Acctivate on the MAPPING section.
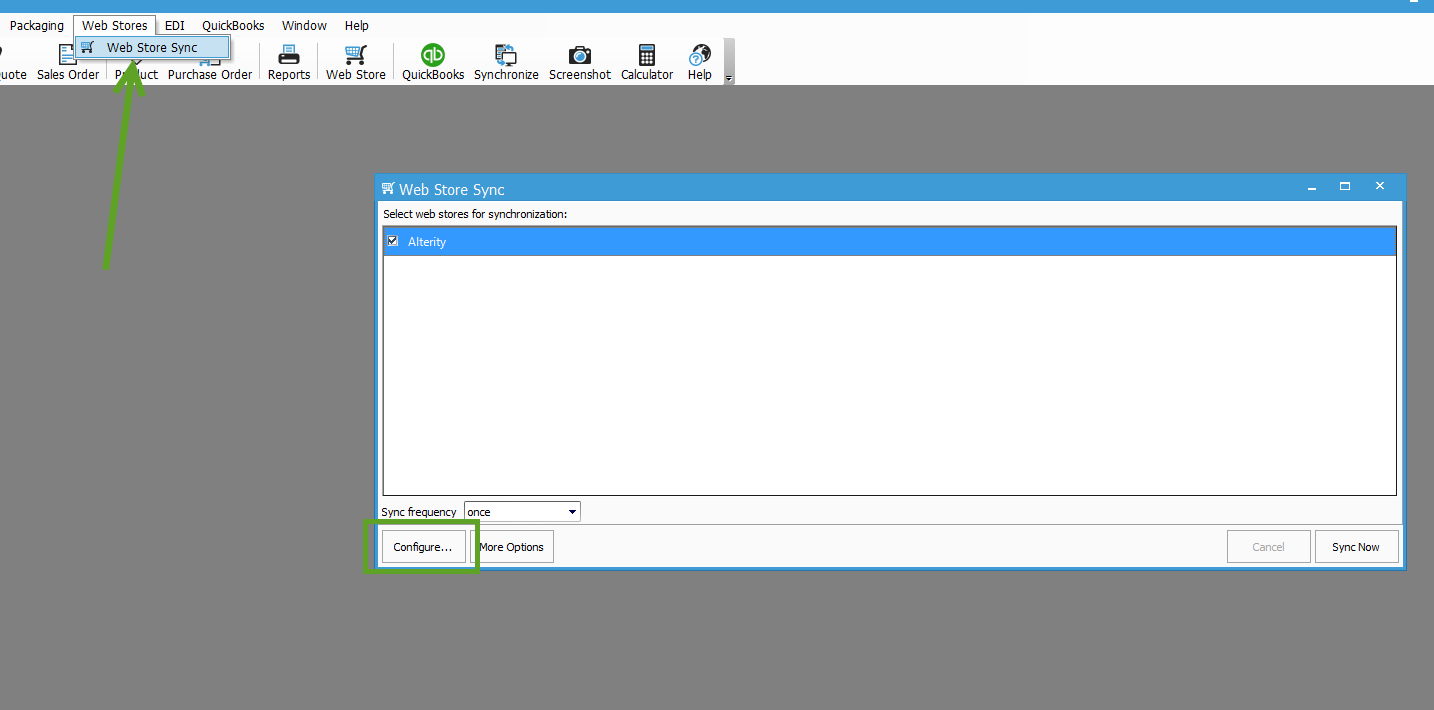
To view the current XPath configuration, click on Web Stores at the top > Web Store Sync > Configure.
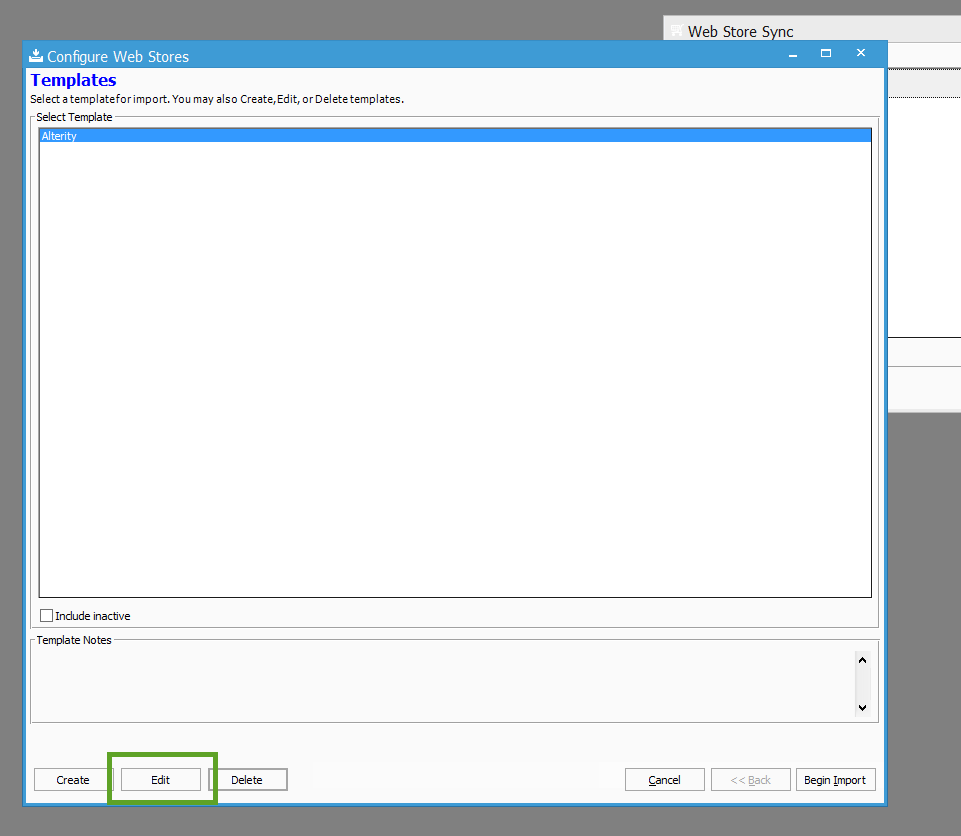
That should bring up a “Configure Web Stores” window where you can choose a webstore template (if you have multiple templates). Choose the template by clicking on it and click EDIT.
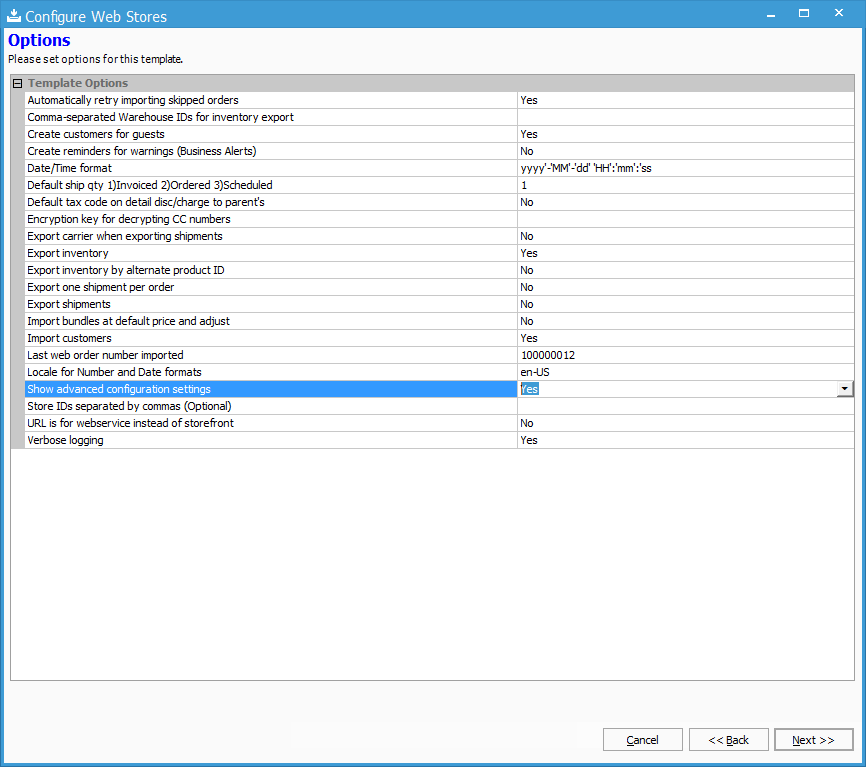
Click Next on the Modify Window > Click Next on Source Window. When viewing the Options window, Ensure “show advanced Configuration settings” = “YES”. This will allow use to view the Xpath configuration on the next Page. Click NEXT
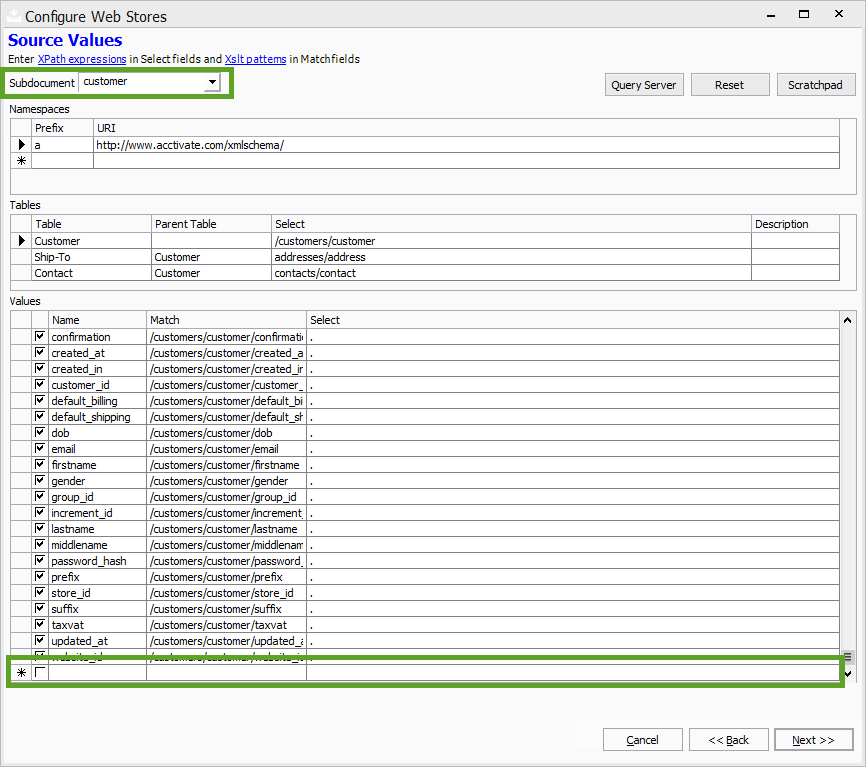
The Source values window shows all the XPath paths, and their related paths. There should be some already filled in as those are the default xpaths for that particular webstore.
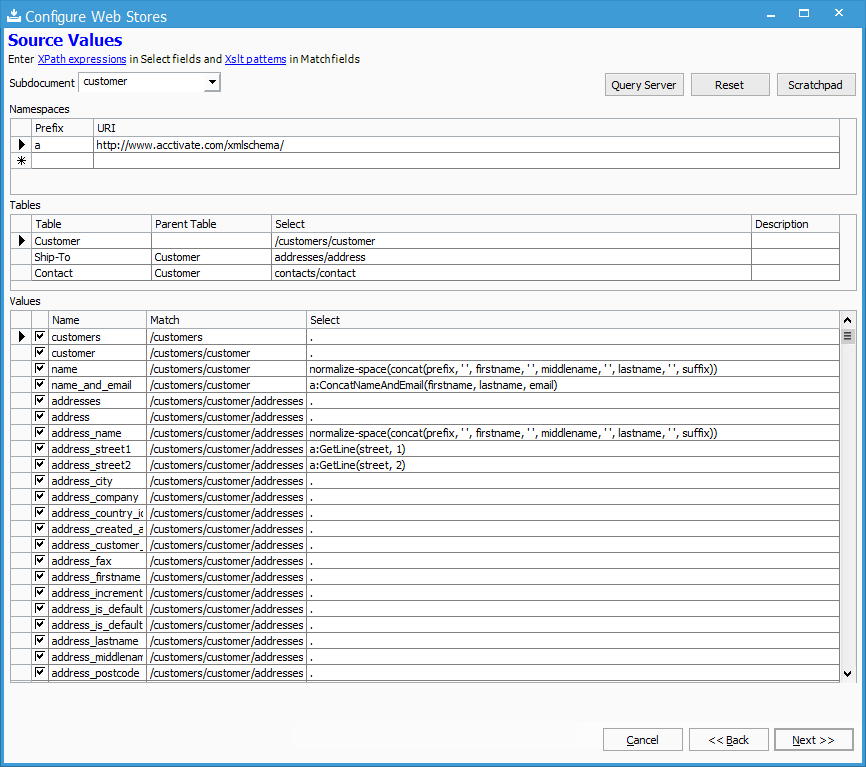
When looking to add a new path to the current configuration ensure the sub document is correct on the top left. If you want a new path for Orders, set the sub document = “Order”, and scroll all the way at the bottom of the “values” section. A new line will appear where you can add a new Name, Match (which is the path to the value in the xml), and it’s select statement.
If you want to jump straight into xpath operators click here for Source Values window - Xpath Operators and Functions.
For more information regarding XPaths, check out our docs page.