Users are able to set up a FTP/SFTP connection within Acctivate to communicate with EDI Value Added Networks (VAN) like SPS Commerce. By using the built in settings, your import and export functions will become more streamlined and intuitive.
As of 11.3, Acctivate now supports SFTP for EDI. You'll need to make sure you update to 11.3 or higher to use SFTP.
In this guide, we’ll walk through how to set up the FTP/SFTP connection in Acctivate. We’ll use settings for connecting to an SPS Commerce server, simply because it is the most common FTP/SFTP server we work with at Acctivate.
First, open the configuration manager and open the EDI folder. In this case, we’re going to set up the FTP/SFTP connection at the <system> level. However, if you have specific FTP servers for certain trading partners, you can repeat the steps in this guide to connect to them individually.
Once you’ve clicked on <system> from the list, expand the “Hide Advanced” option and click on the “FTP Options” tab.
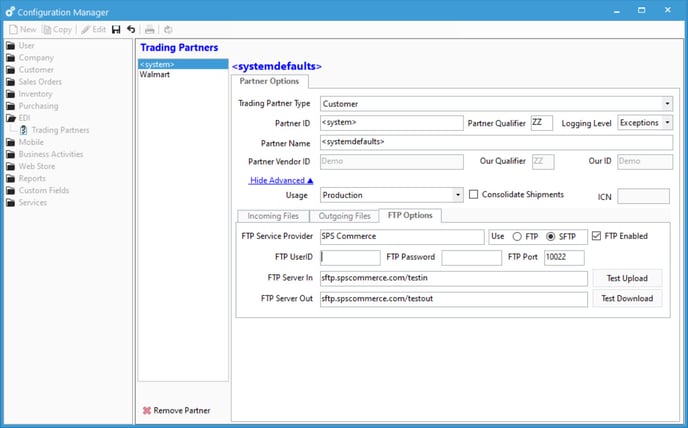
You'll need to mark the appropriate radio button for FTP/SFTP. You will need to get with your VAN if you do not know this. For SPS Commerce, this will usually be SFTP.
If you’re using an SPS server, simply type in “SPS Commerce” into the “FTP Partner Name” field and the “FTP Server In/Out” fields will automatically populate. If you’re using another FTP service, type in the name of the service, and then enter in the file path to the appropriate folder on the server. You may need to work with your VAN to get this information.
In the event that the FTP Server In and FTP Server Out do not populate automatically, try the following:
For testing:
- FTP Server In: ftp://ftp.spscommerce.com/testin
- FTP Server Out: ftp://ftp.spscommerce.com/testout
- SFTP Server In: sftp.spscommerce.com/testin
- SFTP Server Out: sftp.spscommerce.com/testout
For Live:
- FTP Server In: ftp://ftp.spscommerce.com/in
- FTP Server Out: ftp://ftp.spscommerce.com/out
- SFTP Server In: sftp://ftp.spscommerce.com/in
- SFTP Server Out: sftp://ftp.spscommerce.com/out
Next, enter in the username and password needed to access the FTP/SFTP server. You should receive these from your VAN.
Next, we’ll need to set up the incoming and outgoing files tabs. In each, you’ll need to enter the UNC path for the Import and Export folders within the EDI folder on your server. This informs Acctivate where to go to look for new EDI files, and where to place outgoing files for the FTP protocol to send to the cloud server.
The incoming tab should look like this:
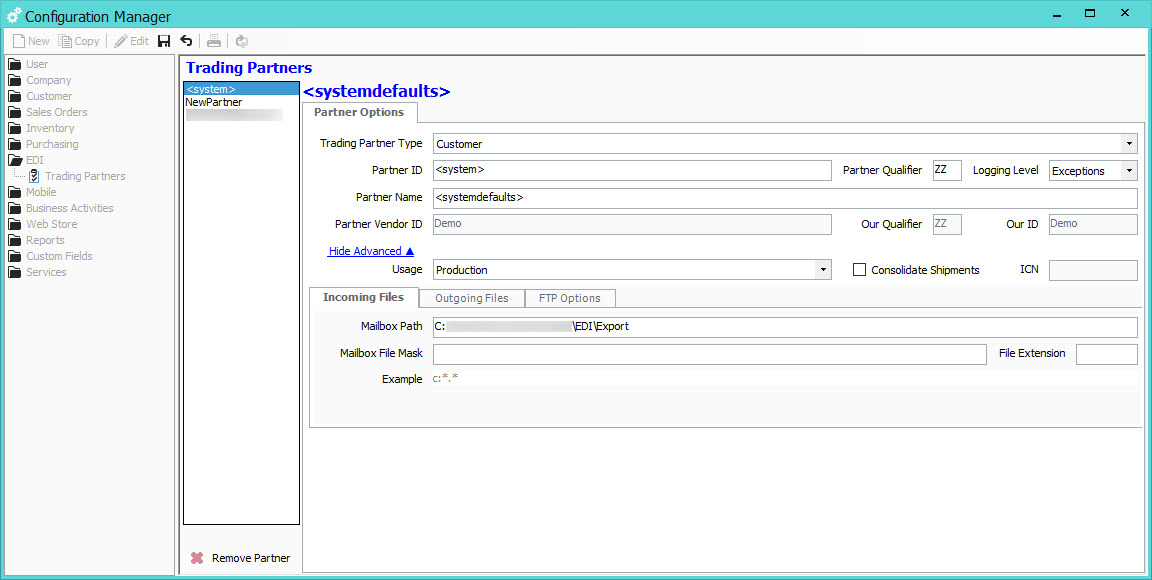
Note: Do not include the C: in the UNC Filepath directory unless this is a part of the file path. For example, if the EDI Import or Export folder is located in the AcctivateData share directory, the Mailbox Path should be \\ServerName\AcctivateData\EDI\Export.
And the outgoing tab should look like this:
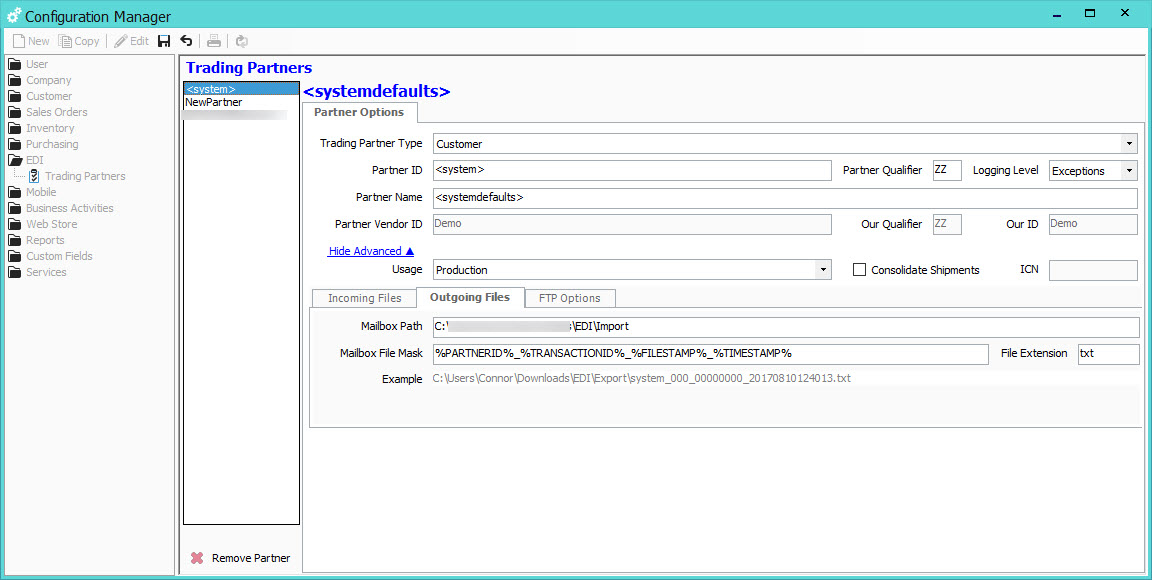
Note: The Mailbox File Mask is an optional field.
Fill in the file extension field with the proper extension for your files. You may need to speak with your VAN about which extensions to use here.
After these fields are filled in, use the “Test upload” button to make sure that Acctivate is able to send files into the proper “Server In” folder specified. If it is successful, you should see a message like the following:
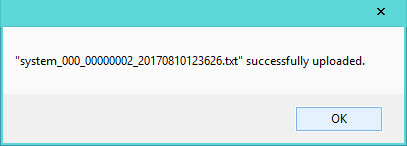
And with that, your FTP set up is complete. If you run into any issues or have questions, please contact Acctivate Support for help!