Map a Source Value in the Mapping screen of the Webstore Configuration window. Next, expand the Conversions section for that field and add rows to convert the From values to the To values.
When receiving in values from a webstore, instead of writing long Xpaths with different conversion formula, you can make and path then use the Acctivate converison tool. Conversions will take place after the value of the Xpath is evaluated.
If you already have your field mapped and just need a conversion, skip steps 2, 3, and 5!
As an example, we will use a Magento webstore and make a conversion on the store_id and which branch matches with it.
- Go to Webstore > Configure > Choose your webstore template > EDIT
- Click the NEXT button until you reach the mapping screen. If this window does not appear, then ensure on the previous “Option” window, “Show Advanced Configuration settings = YES”.
- Evaluate the path in the xml you want to use. In this example, we will use the predefined path for webstore_id. For more information on creating a new xpath that isn’t already in the mapping list, click here.
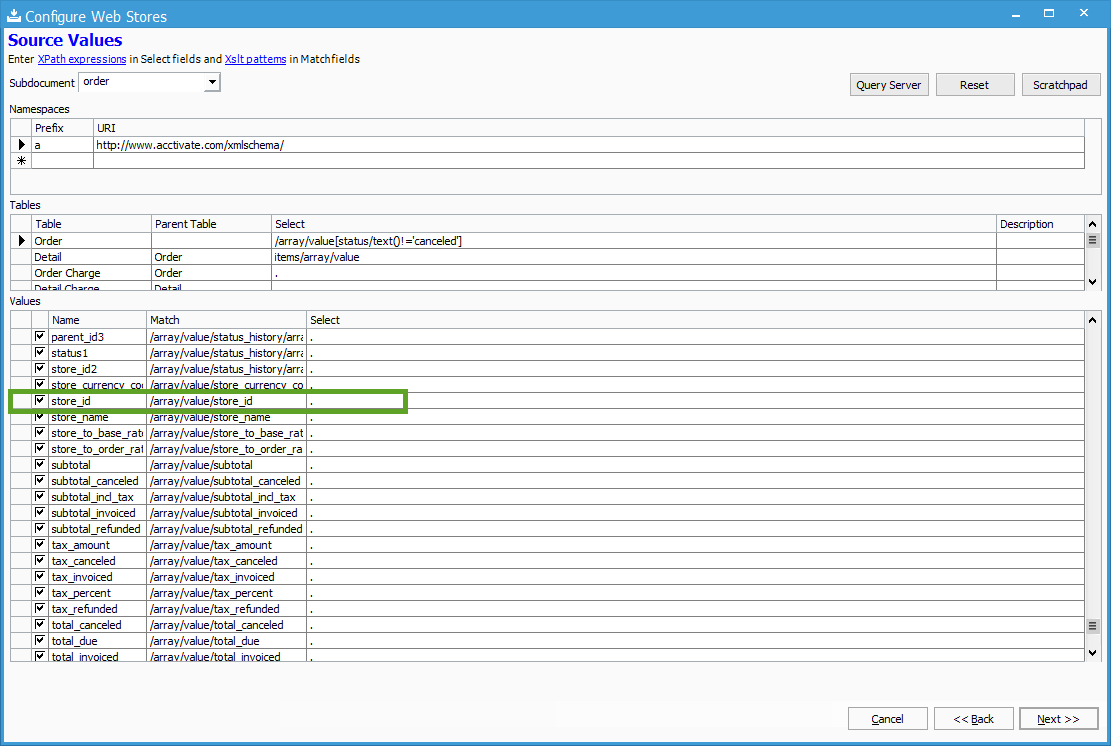
- Once you have your path, click NEXT to the “Mapping” window.
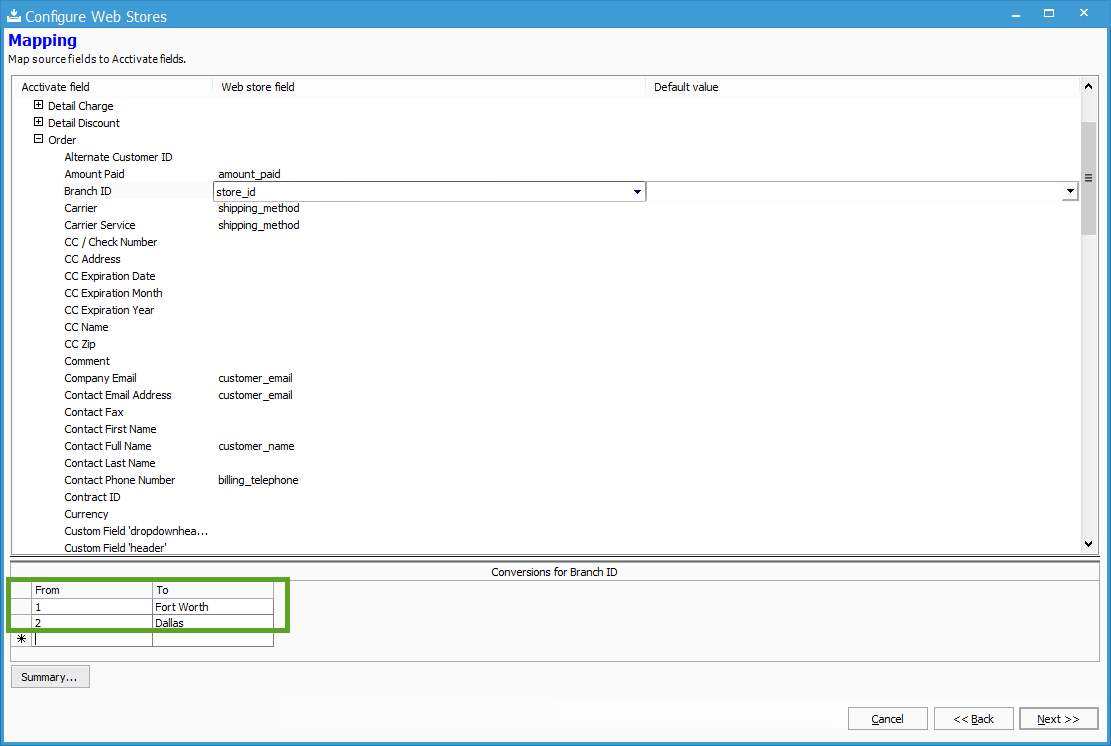
- Wherever the value should be placed on the Sales order or customer window, click the Value drop down and choose the name of the xpath you created or was provided on the mapping window. For store_id, we will assign it to the BRANCH.
- Once assigned to the a field, click on the CONVERSIONS button at the bottom of the window.
- The table represents the FROM value on the left, and the TO value on the right. Store_id may come in as “1” or “2” from the store, thus we will change from “1” to “Fort Worth” and from “2” to “Dallas”. Should appear like the example below.
- Once that’s set, click next and click IMPORT ORDERS. The conversion will now take place on the path specified.
Common web store conversions include:
- Payment Method conversions
- Sales Tax Category conversions
For more information about Xpath, check out our docs page.