The following setup procedure is for Endicia® and Acctivate Inventory Management Software.
If you have not purchased the Shipping Workstation module please contact your Acctivate sales person. The setup typically can be completed in less than one hour.
Configuring Endicia® to Import data from Acctivate
First, make certain that you have completed the ODBC setup (This must be completed before you begin the Endicia® integration process.)
Next, you must be logged into your shipping workstation, launch the Endicia® software.
Acctivate and Endicia Shipping software can be integrated for use with USPS (United States Postal Service). An Endicia customer account is required and must be installed on the Shipping Workstation computer. If you are not an Endicia customer, first contact Endicia and create an online account.
- Once you have created an account with Endicia you must download and install the Endicia Shipping Software.
- Next configure a 32bit ODBC connection. This connection will allow communication between Endicia and Acctivate.
- If you Can’t Find Created ODBC Connection you may have created a 64bit connection, both Acctivate and Endicia will require a 32bit connection.
- Launch Endicia
- Open the Edit menu and select Preferences

Configure Import Mapping:
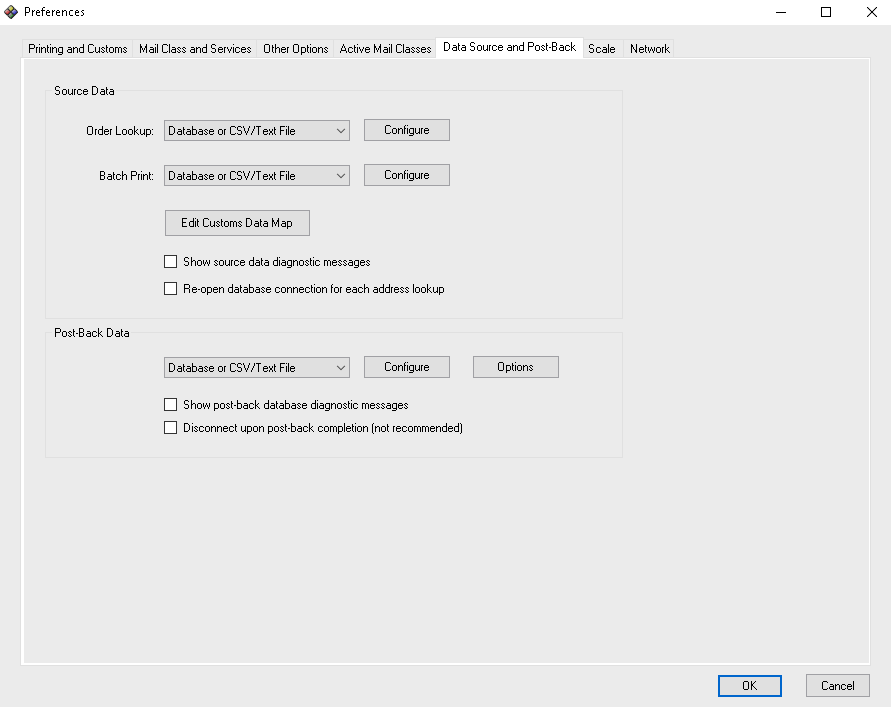
- Select the Data Source and Post-Back tab
- In the Source Data section
- Click Configure for Order Lookup to open the configuration window.
- Select the Acctivate Data Source
You may be prompted to enter the correct Login ID and Password to connect to SQL Server. Click OK.
- The default settings for SQL Server access are:
- Login ID: sa
- Password: Contact support if you need assistance with this
- The password may have been changed during the installation or configuration of SQL Server. If these settings do not work, please contact your database or network administrator to gain access to this database.
- In this window you will map fields from Acctivate into Endicia. This allows Endicia to have access to your orders that are ready to ship.
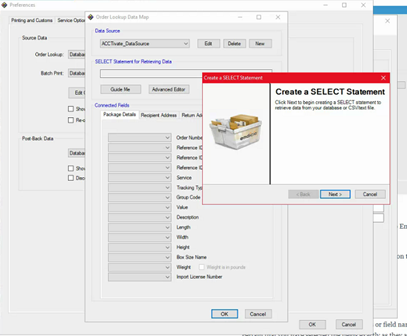
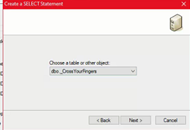
- Select the ODBC Tables drop-down menu, and select the dbo.OrdersAvailableToShip table.
-
- Select the Order Number field to be OrderNumber, click Next
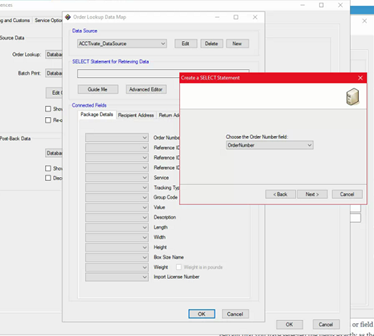
- There are often similarly named table names or field names in this system. Please make certain that you have selected the fields exactly as they are listed.
- Make certain that the Endicia Fields drop-down menu (the right column) is set to Shipment Information.
- Click on the Column Name column twice in the OrdersAvailableToShip table to arrange the column names in alphabetical order.
- Complete the mapping assignments in the following section.
- At this point, you are ready to begin mapping ODBC tables to Endicia Fields, using the mapping list on the following page. This is the most crucial stage of the configuration process.
- It is critical that you have the correct ODBC table name and Endicia Field selected when you click the connect button. The matching ODBC table name and Endicia field are a mapping set.
- Repeat the three steps below for every set that needs to be mapped. Be sure to select the fields carefully, as some of them may look similar. An incorrect mapping will cause unexpected results and possibly make your shipping software unusable.
- Mapping ODBC Tables to Endicia fields:
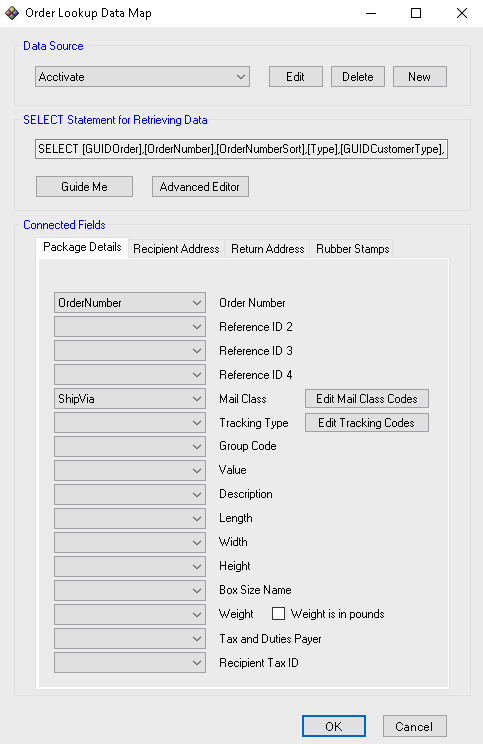
- Click the tab for Package Deals
- Single-click on the corresponding Endicia field (right column).
- Click the dropdown to make your selection. This will map the two fields together.
- Mapping ODBC Tables to Endicia fields:
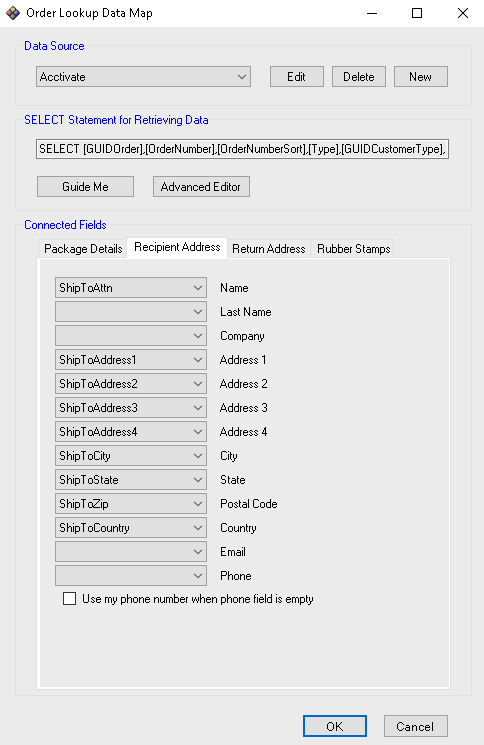
- Click the tab for Recipient Address
- Single-click on the corresponding Endicia field (right column).
- Click the dropdown to make your selection. This will map the two fields together.
Configure Export Mapping:
- In the Post-Back Data section
- Click Configure to open the configuration window.
- Be sure the Acctivate Data Source is selected
You may be prompted to enter the correct Login ID and Password to connect to SQL Server. Click OK.

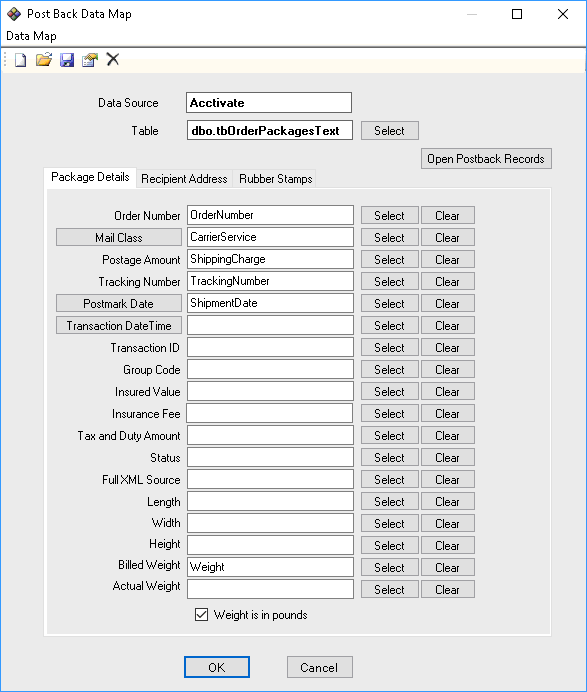
- Select the database table tbOrderPackagesText
- On the Package Details tab Select and Map
- Order Number=Order
NumberMail Class=CarrierService
Postage Amount=ShippingCharge
Tracking Number=TrackingNumber
Postmark Date=ShipmentDate
Billed Weight=Weight - Click OK
- From the Preferences Window select the Post-Back Data Options select the following.
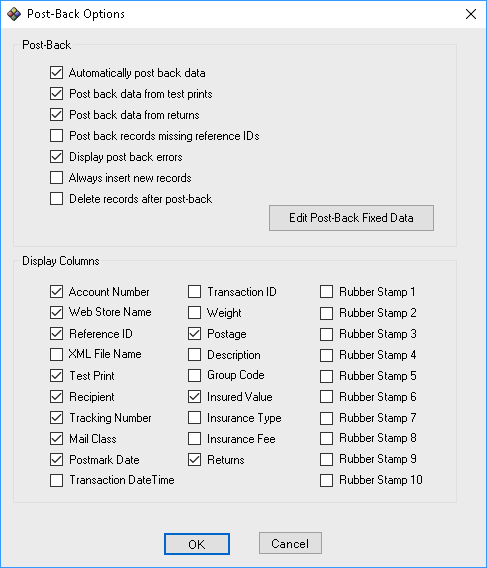
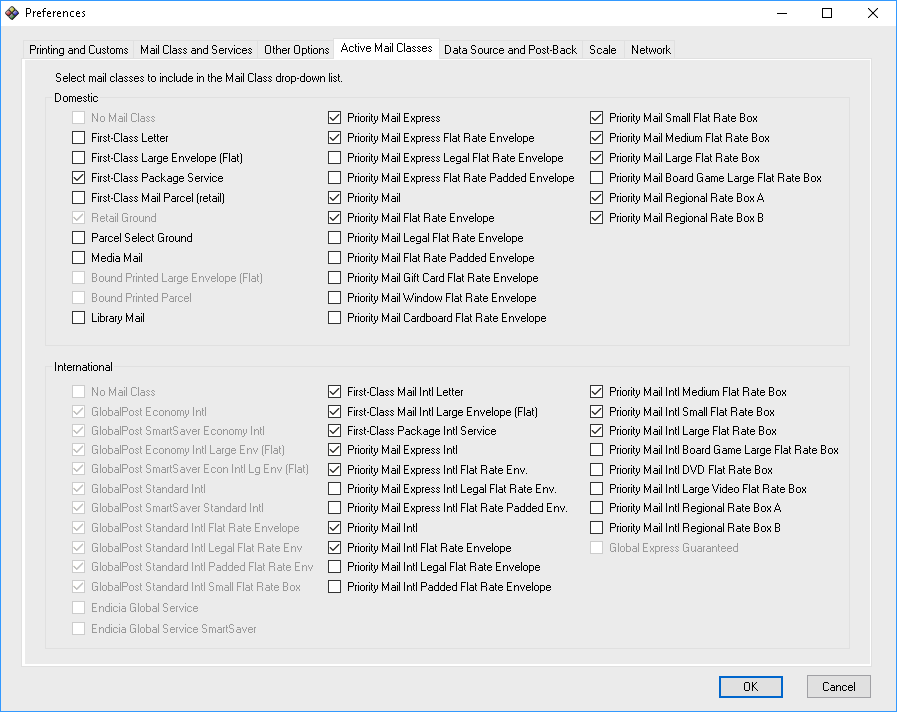
- Select the Appropriate Mail Classes for you.
- Select Appropriate options for Printing.

You have now completed the integration. You may test an order by retrieving the order using the sales order number from Acctivate.