Advanced steps for applying vendor discounts to a purchase order
Acctivate delivers robust and flexible capabilities for QuickBooks purchasing management including the ability to apply vendor discounts to a purchase order.
A Vendor may elect to give a discount on a PO. This can be accomplished in Acctivate by making adjustments to the Prices on the PO. However, a user may not wish to change the Cost of their products by adjusting the Prices, and instead may wish for the discount to come off of the total of the PO Invoice (Vendor Bill in QuickBooks). Another method for adding a discount to the PO is discussed in this help article.
This article will show a more advanced method of adding a discount to the PO which can be configured and used on future POs for that Vendor.
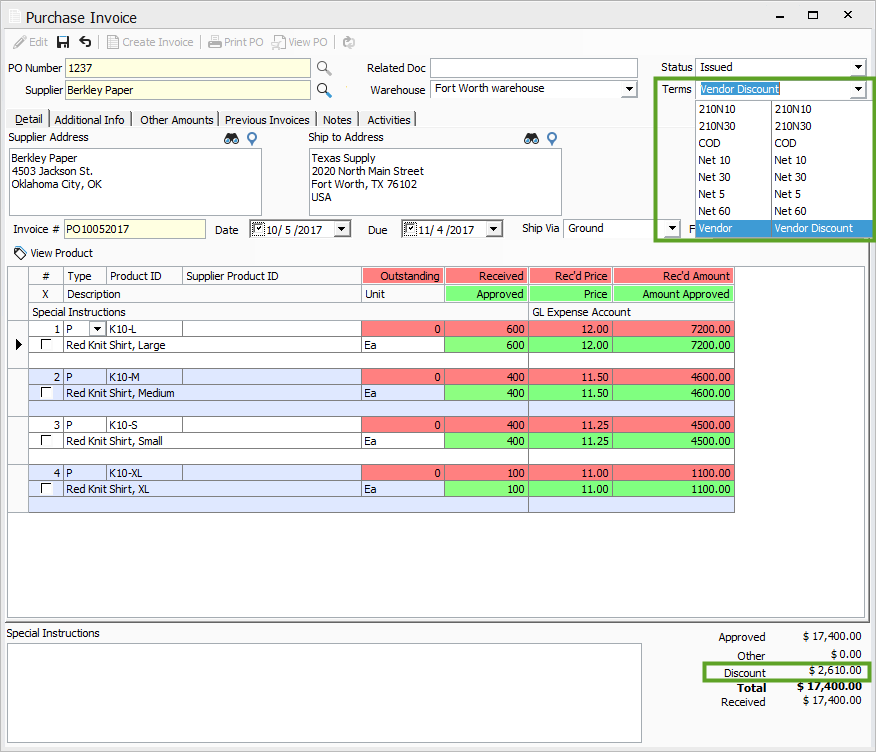
In the screenshot below, we can see PO 1237 for Berkley Paper. This PO has 4 lines, all of which have been received but not yet Invoiced. The grand total on this PO is $17,400.00.

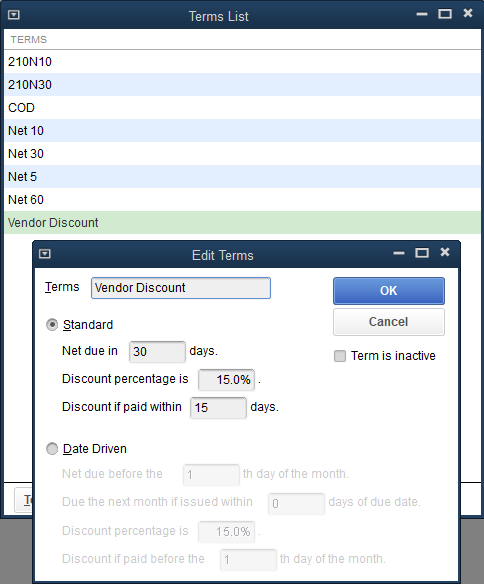
When Invoicing this PO, a user could modify the approved Price of each line, but that would update the Cost of the posted Receipt to match, which that user may not wish to do. A discount can be applied to the whole of the PO without changing the Cost of your products, by selecting to use a Terms Code which includes a discount. In this next screenshot, we can see the Terms List in QuickBooks (see this help article). Here, you can see a Terms Code called “Vendor Discount” (this can be called whatever, Vendor Discount is just an example). Notice that the Net Due is set to 30 days, but a Discount percentage of 15 is applied if paid within 15 days.
After the new Terms Code has been created in QuickBooks, and a sync has been run to push the new Terms Code to Acctivate, you will see it as an option in the Terms drop down on the PO. Select the Terms Code with the discount and set the Date of the PO Invoice. In the screenshot below, notice that the Terms Code has been set to Vendor Discount, which has a 15% discount ($2,610.00) if paid within 15 days. Since payment for this PO Invoice is not taken in Acctivate, the Discount amount shows, but does not affect the Total in Acctivate.
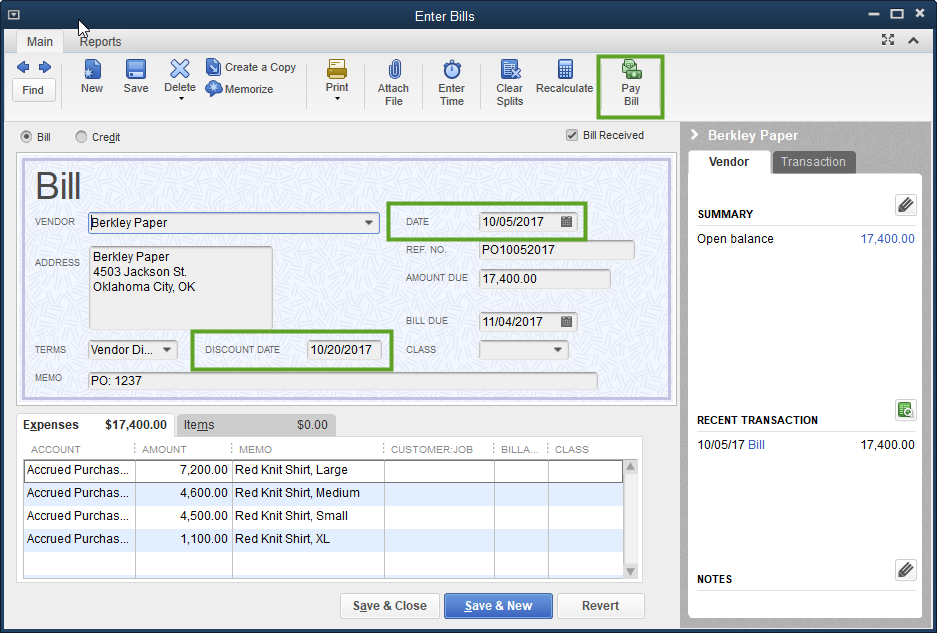
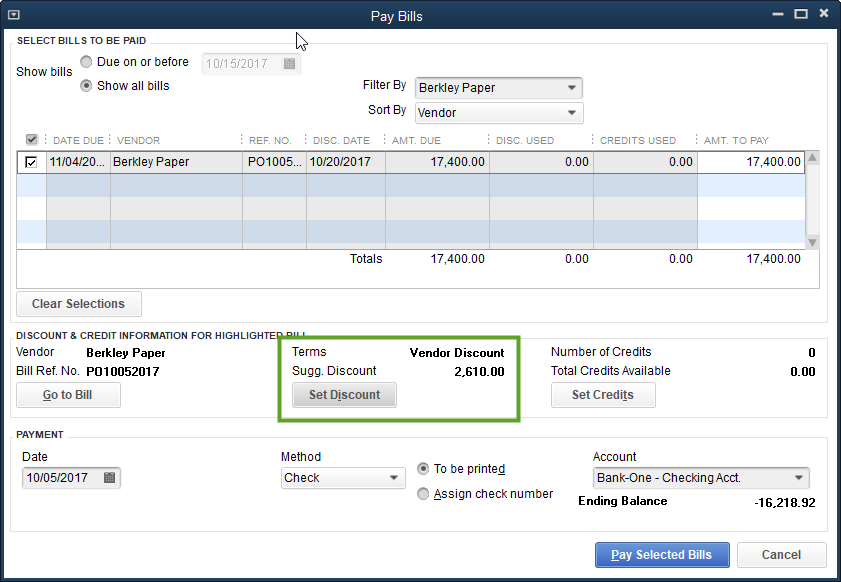
Once the PO Invoice has released from the PO in Acctivate and has synced to QuickBooks, take a look at the Bill in QuickBooks. In the next screenshot, notice that the Bill shows a Discount Date of 10/20/2017, which is 15 days after the Bill Date of 10/05/2017. As Payment has not yet been applied, the Total Amount still shows as $17,400.00. The discount can be applied when you select to Pay Bill.
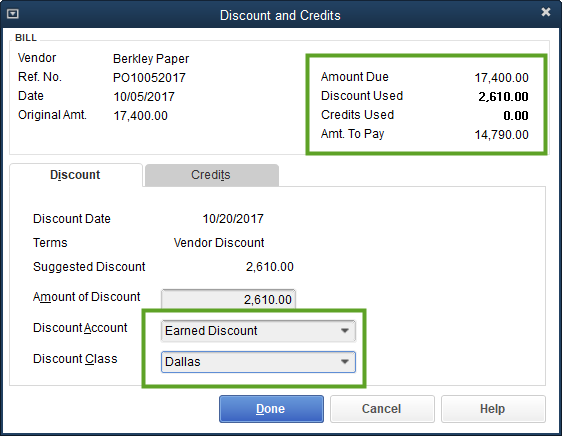
Based on the Terms Code used, QuickBooks shows a suggested Discount amount. To set this on the Bill, select to Set Discount.
This will open the Discount and Credits window in QuickBooks. Here, you can select which Discount Account and Discount Class you wish to use related to this Bill. Set these and click Done. Notice that the Amount Due shows $17,400.00, but with the applied Discount of $2,610.00, the Amt. To Pay only shows as $14,790.00.