This article explains how to print product labels from the Purchase Order window.
Acctivate allows you to generate product labels from a vendor Purchase Order based on the products ordered and purchase order quantities. From the Purchase Order window, you would click the 'Labels' button in order to see the label options; you can choose from a bar code label or a product label. The labels may need to be modified to fit your label size or include any particular information. If you are not already working with a Crystal Reports writer then contact our support team for more information.
Product Labels for a Purchase Order are printed from the Purchase Order window and used to affix to incoming products.
Print product labels for a PO:
- Select Purchasing > Standard Purchase Order to open the Purchase Order window.
- Create a new purchase order or open an existing one.
If you are creating a new PO, enter all necessary information into the provided fields and tabs ( esp. the Detail tab) and click the Save button, so that you will be able to print labels. - Click the Print Product Labels button from the window's toolbar.
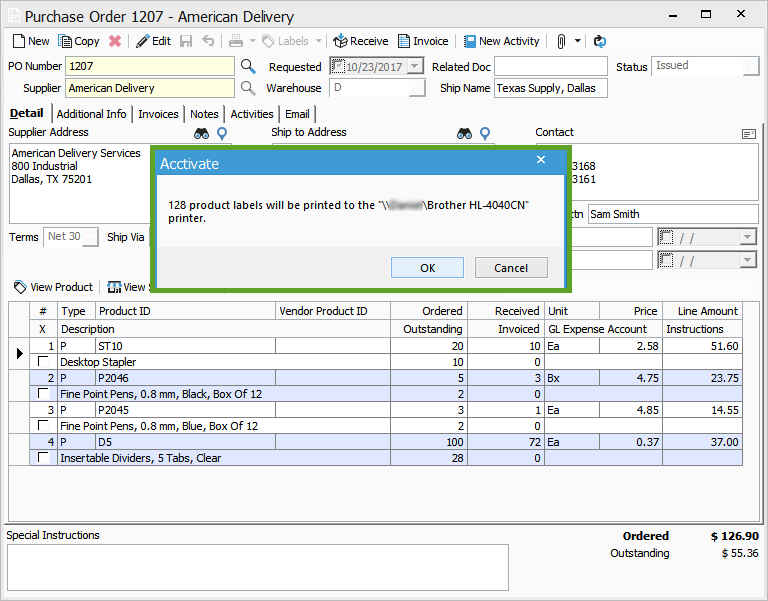
A prompt will appear, showing how many product labels will be printed (based on the products and quantities chosen in the Detail tab) and to which printer. Click the OK button to print the labels or the Cancel button to cancel the job.
If you clicked OK the labels will print to the specified printer.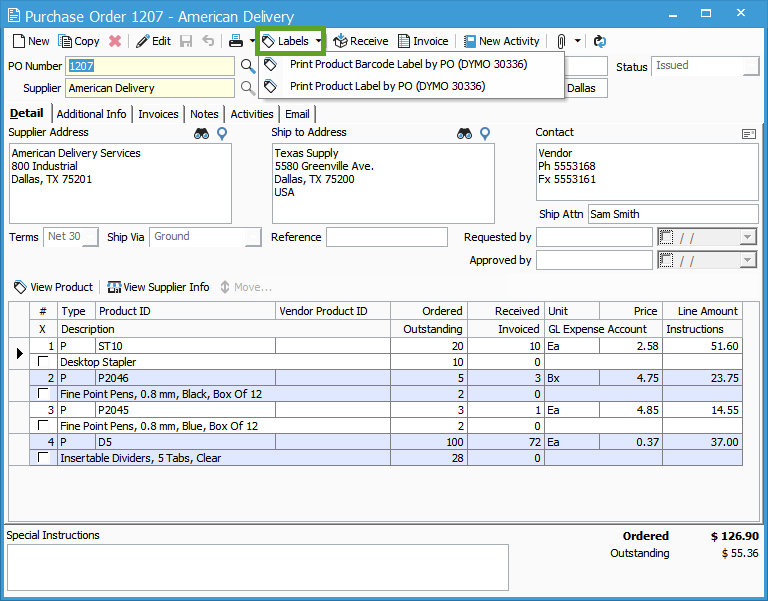
- When you choose the label that you would like to print, Acctivate will confirm that you want to print the labels to the default printer. You will not get a preview, the labels will be sent directly to the printer. Each product will have a number of labels printed that match the ordered quantity.