Track Sales and Cost of Good Sold on Profit and Loss, by summarizing Sales and Cost of Goods sold by a number of different options. Go to File > Configuration Manager > Sales Orders > Sales / COGS.
Acctivate can be configured to use QuickBooks Class Tracking, which will allow users to track Sales and Cost of Good Sold on Profit and Loss, by summarizing Sales and Cost of Goods sold by a number of different options. Once Class Tracking has been enabled in QuickBooks, users can configure Acctivate to use these classes by going to File > Configuration Manager > Sales Orders > Sales / COGS. You will find the QuickBooks Class Tracking section, including the two dropdowns for Invoice and Invoice Detail lines respectively.
![]()
Invoice Summary Options
- Branch
- Salesperson
- Customer Type
Invoice Detail Lines Summary Options
- Branch
- Sales Category
- Product Class
- Salesperson
- Customer Type
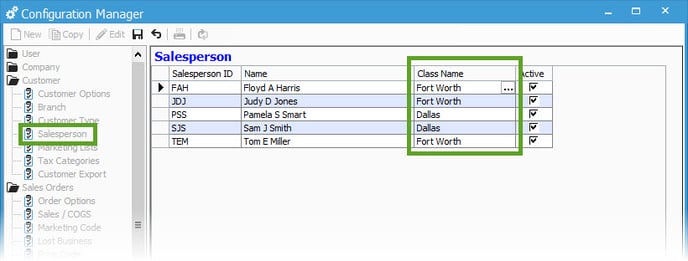
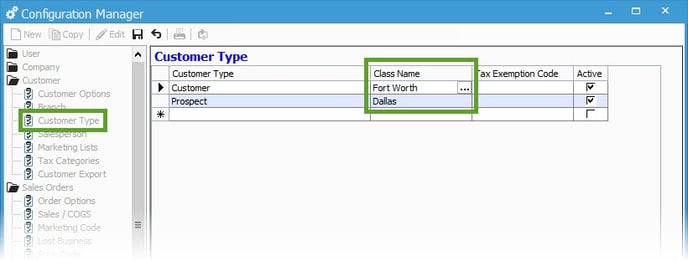
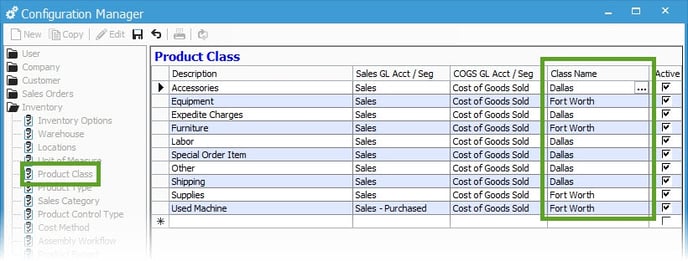
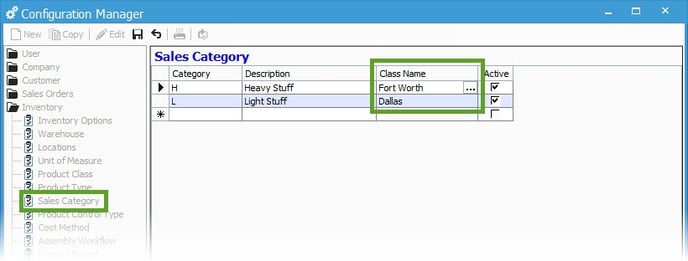
The default and most common option is to link the Branches to QuickBooks classes, allowing you to track income and COGS by the different Branches/Class. Also, keep in mind that QuickBooks Class Tracking must be enabled for these options to to be available.
Once the Invoice and Invoice Detail Class Tracking options have been assigned, you can select which QuickBooks Class to set up for each option. In the example above, we used Branch to specify Class Tracking, so the Class will need to be assigned to each Branch (under File > Configuration Management > Customer > Branch).

Similar fields will appear based on the selection in the Sales / COGS configuration. If you want to track by the other options listed above, you'll assign the QuickBooks Class to that specific group in their respective configuration sections.